
Before you begin carving your walkingstick, you need to be familiar with the woods that work best. Also, you will want to be familiar with the different techniques of whittling. David Allen used these techniques to carve his walking sticks. You can also find famous quotes about walking sticks, and how to carve them. Here are some tips to help make the perfect walking sticks. So, read on to learn more! You can now create a walking stick that is unique and functional!
Woods that are suitable for carving a walkingstick
Finding a straight blank is the hardest part of the whole process. Although you might find a few trees with bent branches, it is important to keep looking until you find a straight section. The ideal time to harvest a straight branch is during the winter months when sap travels from branches to root, making the wood more stable and less likely to split. You can harvest the wood as soon as the tree is green, even if it is too late for the spring.
You can use a variety of wood species to carve a walking stick. The North American hardwood Chestnut is strong. Because it is dense, it can be used to make walking sticks and other similar tools. This wood grain is sometimes slightly open or slightly closed. This makes it a sturdy walking stick that feels stable and smooth. It is also quite attractive and is widely used in carving. You can carve some species with the bark still in place.
How to make a walking stick
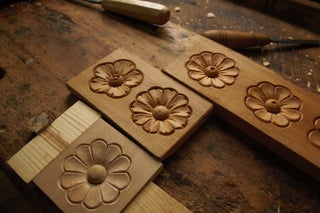
There are a few basic techniques to carve a walking stick. First, choose a piece made of wood that is unique in texture. Some woods are unique in their bark colors and patterns, while others have natural swirls. These features can be enhanced with lacquer and paint. To make it more attractive, you can carve the wood shaft. Finally, ensure you choose straight sticks that are free of branch shoots and tough spikes.
This book will help you learn about the various types of wood and styles of carving. Most common are snakes and Lions. In addition to snakes, you can also carve realistic figures such as eagles, fish, and even deer. Many people consider the skills of these artists to be God-given. This is a book for the novice or the advanced carver.
David Allen uses tools to carve a walking stick
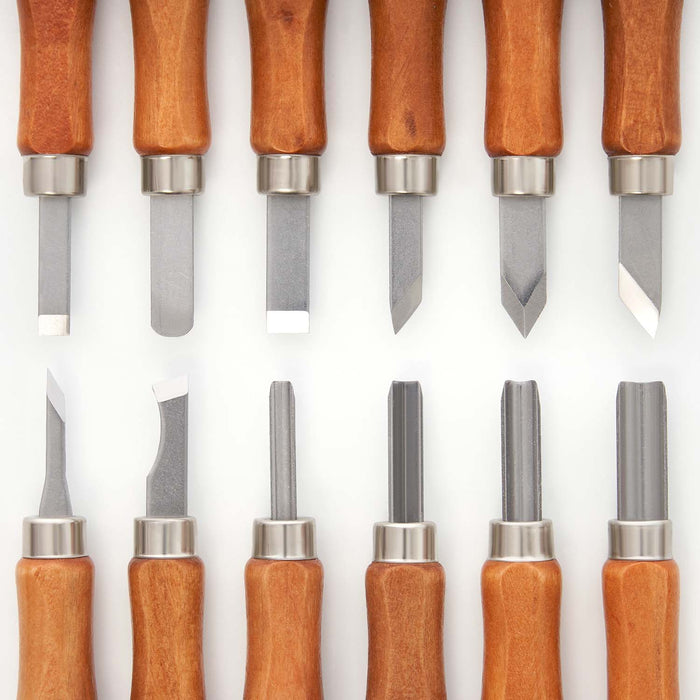
David Allen started making toys when he was young. He used a pocketknife from his childhood to create them. Because he was too young to use a knife, he had to keep it secret from his family. His creations were toys like slingshots as well as utilitarian objects, such shoeshine containers and other toys. Allen, at 15 years old, became disabled and began carving walking stick. Allen used a pocketknife to cut the wood.
Allen created his designs alone, digging around the roots saplings to find out what to carve. Allen believed that a design must "see" itself before it can be carved. This process reminded him of the work of many African American artists. Allen had many visions and dreams of the design he wanted. This allowed him to create a stick that would resonate with the emotions and feelings of his community.
Famous quotes about carving a walkingstick
Carving a walk stick is a difficult process. You need a good blank. The most difficult part is to find a straight blank. You can find a wide variety of sources for your stick, but you must be persistent to find one that's straight. It may appear bent beyond practical use, but keep searching until you find one. If possible, try to cut your stick during the winter when sap is flowing from the tree's branches to the root. The sap makes the wood softer and less likely to split.
The wood's texture, color and grain are important considerations when selecting wood. Each piece of wood has its own unique texture and color, and may have unique swirls or bark marks. The lacquer will make these natural swirls even more beautiful. You want a smooth finish so make sure to remove any branches shoots or spikes from the shaft. This will make the entire process easier. No matter what material you choose to use, it is important that you consider the type and finish you will use.
FAQ
What wooden items do you sell well?
These wooden products are the most popular. They were made from sustainably harvested wood.
Most furniture is made from oak, maple, mahogany or walnut.
These woods are extremely strong but also have beautiful colors and grain patterns. They can also last for years if they are properly cared for.
Wooden furniture should always be painted first to protect against moisture damage. This applies to all surfaces including drawers, doors, handles, and handles.
You want your furniture to last as long as possible so you need to choose a paint that is water resistant.
Followed by two coats, you should apply a quality oil-based primer. Depending on the amount of wear, you may need several coats.
Spray cans and aerosol spray paints are not recommended. These products contain solvents which evaporate quickly and leave behind harmful fumes.
What is the average time it takes to finish furniture?
It all depends upon the size of your piece of furniture. Smaller projects like boxes and picture frames can be finished within one day. Larger projects, such as desks and dining tables, can take several days. It takes time for the wood to be stained and sealed properly.
Where can you buy hardwood lumber?
Home Depot offers hardwood lumber. They offer a wide range of wood products including flooring, cabinets, furniture and more.
There is also a wide selection of engineered hardwoods, including Ipe (Araucaria Angustifolia), Brazilian Cherry(Pau d'Arco), Mahogany (Swietenia Mcrophylla).
You can search Google for hardwood lumber to find them online.
Which woods are good to use for furniture-making?
Woods can be classified according to how hard they are. Softwoods can be pine, fir or cedar. They're often used for outdoor furniture because they don't rot easily. Hardwoods include oak, maple, mahogany, and teak. They can't withstand the elements outside so they're best kept indoors.
Can I make a living doing this?
Yes! Many woodworkers have this ability. According to the U.S. Bureau of Labor Statistics, the median annual woodworker wage was $34,000 in May 2012. This is more than the national average of 31,000 per annum.
Statistics
- Woodworkers on the lower end of that spectrum, the bottom 10% to be exact, make roughly $24,000 a year, while the top 10% makes $108,000. (zippia.com)
- The U.S. Bureau of Labor Statistics (BLS) estimates that the number of jobs for woodworkers will decline by 4% between 2019 and 2029. (indeed.com)
- Overall employment of woodworkers is projected to grow 8 percent from 2020 to 2030, about as fast as the average for all occupations. (bls.gov)
- In 2014, there were just over 237,000 jobs for all woodworkers, with other wood product manufacturing employing 23 percent; wood kitchen cabinets and countertop manufacturing employing 21 percent. (theartcareerproject.com)
External Links
How To
How to make wooden joints
This tutorial will teach you how to join two pieces wood together. We will be using the "pocket-hole joint", which involves drilling holes in wood and then gluing them together. This method works great if your wood is straight and smooth. You might consider dowel joinery if your wood isn’t straight or flat. These are the steps
-
Drill Pocket Hole Joints. First, measure the area where you wish to place the pocket joint. Use a jigsaw or handheld drilling machine to drill 3/8 inch deep holes at the ends of each wood piece.
-
Sand Smooth. Sanding the edges of the wood will help to prevent the joint from splitting later.
-
Glue the two sides of the wood together. Apply glue to both sides of the wood. Allow it to sit for approximately 5 minutes before you clamp the pieces together.
-
Connect the pieces. After the glue has dried completely, you can clamp the pieces together until they are flush.
-
Trim Joinery. After the glue dries, trim any excess wood around your joint.
Be sure to leave enough space between each piece so that they can be turned inside-out.