You can add color to wood carvings by using watercolor paint. The paint absorbs into the wood, showing the wood grain. You can choose to buy watercolor paint in tubes, or cakes. The latter are thicker, and more likely to drip. Keep in mind that water-based paints may be affected by dust or wood shavings, so be careful. If you don't have time to paint, apply a thin coat of primer.
Oil-based oils
Oil-based paints can be used to paint wood carvings. Oil-based paints work better on some wood types like maple wood and birch. However, if you are painting a kitchen utensil, you may want to avoid oil-based paints. Oil-based oil paints are great for wood carvings.
Watercolors
Watercolouring wood with paints can be a fun way to express creativity, while keeping the wood’s integrity. Watercolors are non-warping. However, they do require a good amount of prep work. While sandpaper is a useful tool, you'll want to use a fine grit sandpaper for the center section of your wood carving. The wood will frame the watercolor pigments, making them pop out. Protective eyewear and a dust-removal tool are recommended for safety.
Gesso
Preparing your wood carvings is essential before you can start painting them. You can use either the student or artist grade of gesso. Student grade is usually white while artist grade is darker. Acrylic paint is also available for those who want more pigmented paint. To create the desired color, you will need a combination of gesso and paint. After drying, apply several thin coats paint.
Acrylic paints

Acrylic paints make beautiful woodcarving projects. Acrylic paints can be used on many wood surfaces and are non-toxic. Plus, they're non-toxic. Additionally, they're ACMI certified, making them perfect for those with sensitive skin. Here are some tips for choosing acrylic paints for painting woodcarvings:
Oil-based paints mixed with gesso
Gesso is a mixture of whiting and animal glues. You can find it in white or colored versions. The type of gesso you choose will determine the consistency. Some brands will apply quickly, while some will leave a toothy look. You can experiment with many brands to find the one that suits you best. The Liquitex Super Heavy Gesso is a good choice for creating sculptural effects on a canvas. Use a palette to apply it.
Basswood panel
Before you begin painting your basswood panel with paint, make sure that you seal it properly. The wood's natural components can cause paint to deteriorate over time. Sealers keep the wood's surface smooth and uniform so that paint doesn't penetrate the wood pores. The finish will also be more durable if the wood is sealed properly. Here are some suggestions to seal your panel of basswood. The right sealer is needed for your basswood panels.
Sealing coats
You must follow all instructions when applying a sealer on wood carvings. Use a paintbrush for applying the sealer to the entire carving. Before applying the next coat, let the sealer dry completely. Sand the carving lightly once the sealer is dry. If you have a very fine carving, skip this step.
Using gesso
You should prepare your wood carving by applying gesso at both the front as well as back surfaces. This material absorbs more paint than student-grade gesso. It is often thinner than the latter. For greater pigmentation, you can mix it with acrylic painting. But it's not necessary. The amount of paint used will influence the thickness.
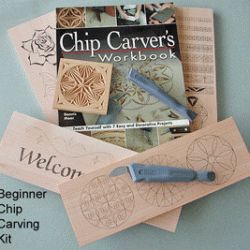
Selecting a wood
The choice of wood to paint wood carvings is critical. It can impact the size and shape of the piece. Choosing a light, neutral wood will allow you to paint over light tones and highlight dark ones. You can also paint the wood over with a darker color if it is too dark. It doesn't matter if the wood is to be painted whole or in parts, a neutral tone will do.
Pre-treatments
Many wood carvings can be painted or colored. These works of wood art require pre-treatment in order to prevent oils, water, and paints leaking through. This is especially true with softwoods like basswood that are highly absorbent. Wood carvings are easy to paint with a wood-based oil paint. However, this can cause problems so be sure to follow these simple guidelines. This article will help you to prepare wood for painting.
FAQ
What would be your first step in woodworking?
Start with softwoods, such as pine or poplar. After you are comfortable with the softwoods, move to hardwood.
Can I make a living doing this?
Yes! Many woodworkers have this ability. According to the U.S. Bureau of Labor Statistics in May 2012, the median annual income for woodworkers was $34,000 That's higher than the national average of $31,000 per year.
What kind of wood should you use?
The most commonly used woods for woodworking are oak, maple, cherry. Each type of wood has its own unique characteristics that can affect the final product's appearance. Oak tends to be harder and darker than other woods. Birch is soft and lightweight, while mahogany is denser and heavier. You also have the option of solid wood or veneers. Veneers consist of thin sheets made from wood and glued together to form a single layer.
Statistics
- Woodworkers on the lower end of that spectrum, the bottom 10% to be exact, make roughly $24,000 a year, while the top 10% makes $108,000. (zippia.com)
- The U.S. Bureau of Labor Statistics (BLS) estimates that the number of jobs for woodworkers will decline by 4% between 2019 and 2029. (indeed.com)
- In 2014, there were just over 237,000 jobs for all woodworkers, with other wood product manufacturing employing 23 percent; wood kitchen cabinets and countertop manufacturing employing 21 percent. (theartcareerproject.com)
- The best-paid 10 percent make $76,000, while the lowest-paid 10 percent make $34,000. (zippia.com)
External Links
How To
How to stain wood
Staining wood refers to applying chemicals to wood's surface. This chemical reaction causes the wood to change in color. The wood will turn from white to brownish-red due to the chemical reaction. Oak is the most common wood type for staining. However, you can also use other wood types.
You can apply wood stains in many different ways. Mixing the stain in a solvent such as turpentine and spraying it onto the wood is one method. Some methods involve a mixture of water and dye that is applied directly to the wood. It is possible to mix stain into varnishes and paints, making it part of the finishing coat.
Preparing your wood for staining is the first thing to do. Clean the wood to get rid of any grease, dirt or other substances that might be detrimental to the stain's application. Sanding the wood smooths out rough spots and scratches. The next step is to choose the stain type you want. There are two types of stains that can be used: penetrating and non-penetrating. Penetrating colors penetrate deeper into wood than those that are non-penetrating. This makes them more suitable for darker colors, such as mahogany. Light colors such as maple work well with non-penetrating stain.
After choosing the type and application method you prefer, gather your tools. You can use a paintbrush to apply stains. This allows you spread the liquid evenly over the surface. A few rags are also handy to clean up any spillages after you have finished painting. If you plan to mix the stain yourself, make sure you have enough containers available to hold the different components of the mixture.
Once you have prepared your materials, start by cleaning the area where you plan to stain the wood. Use warm water and soap to clean away dirt and dust. Wipe the entire piece of furniture with a rag dampened with clean water. Be sure to get rid of all loose material, especially if staining is planned for darker wood.
Next, spray the stain. Apply the stain by brushing or spraying it onto one side of the furniture. You should work slowly and carefully. Continue moving along the grain until you reach your opposite end. You must be careful not to allow the stain to drip off the wood's edges. Before moving on to the next steps, allow the stain drying completely.
Apply a clear polyurethane sealant to protect the painted surface. Apply three coats polyurethane sealer. Allow the third coat, which should dry overnight, to dry before sanding.